
A dessert table becomes the instant focal point of any event—whether it’s a birthday, shower, or holiday party. People gather around it, snap photos, and admire every detail. That’s why creating a chic dessert table is one of the easiest ways to impress guests without overspending. The ideas below help you build stylish displays using simple props, smart layering, and everyday items you may already have at home. Each tip keeps setup practical, affordable, and easy to follow.
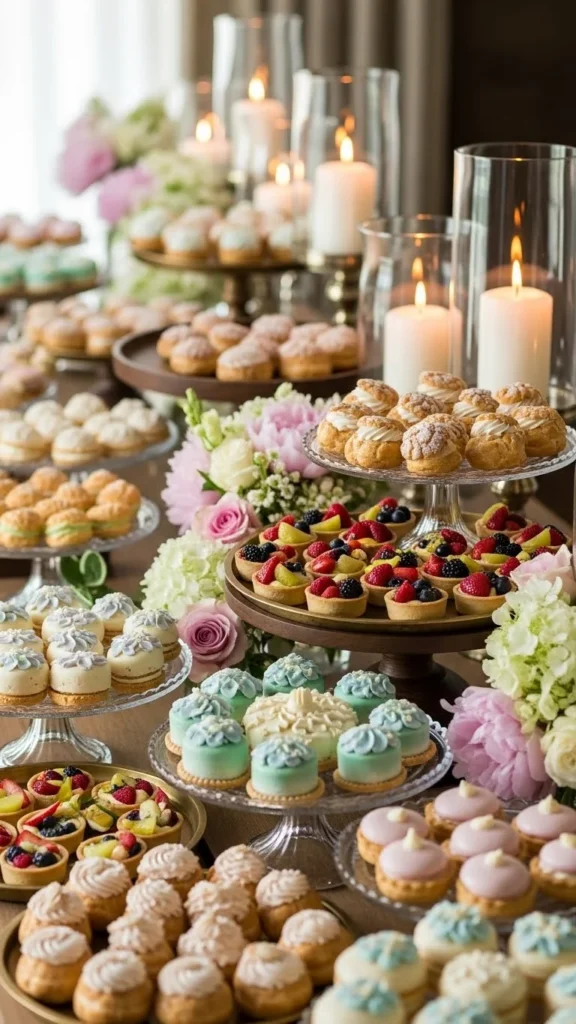
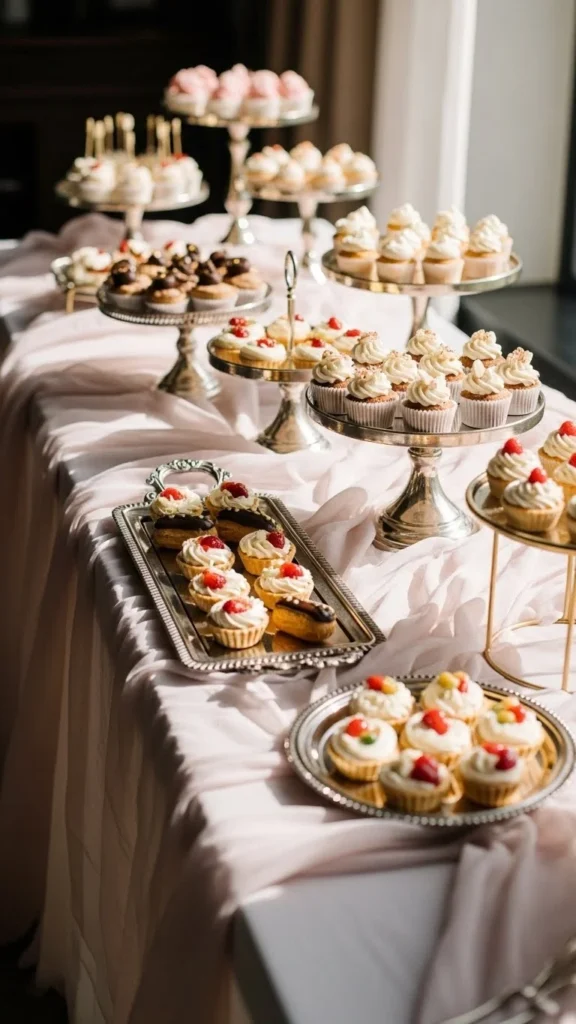
1. Layered Cake Stands for Height and Balance
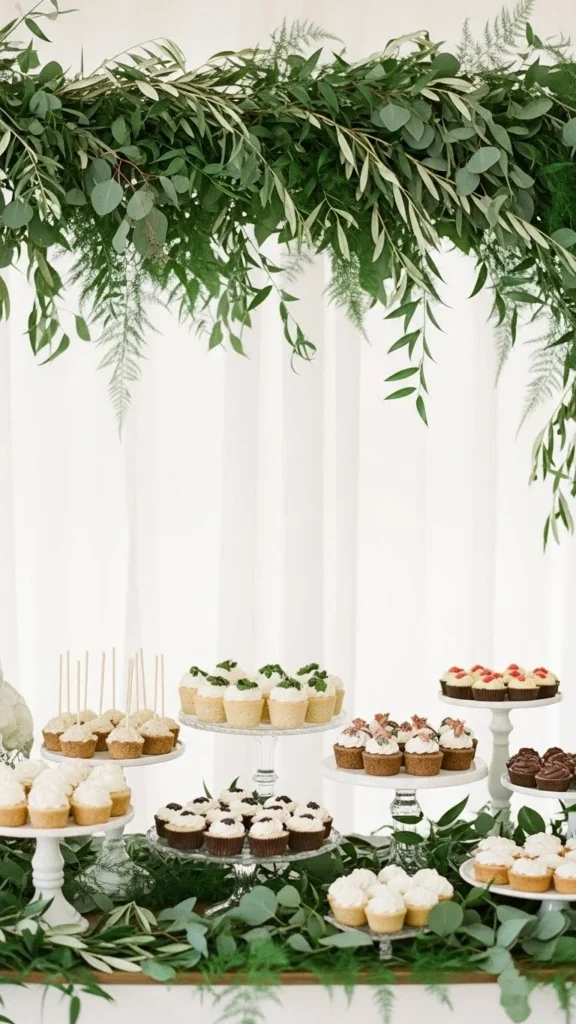
Using stands in different heights creates instant visual interest. It keeps the eye moving and gives your table a polished look. Mix pedestal stands with flat trays for simple contrast. You don’t need pricey pieces—thrift stores often have ceramic or glass stands that look stylish once cleaned up. For DIY height, flip bowls or sturdy cups upside down and place plates on top. Stick to three main heights to avoid clutter. Add tiny cupcake pedestals or mini risers to fill small gaps. This setup works for any theme and makes your desserts feel special without extra effort. Keep color tones consistent so everything blends smoothly.
2. Fresh Florals for Soft Elegance
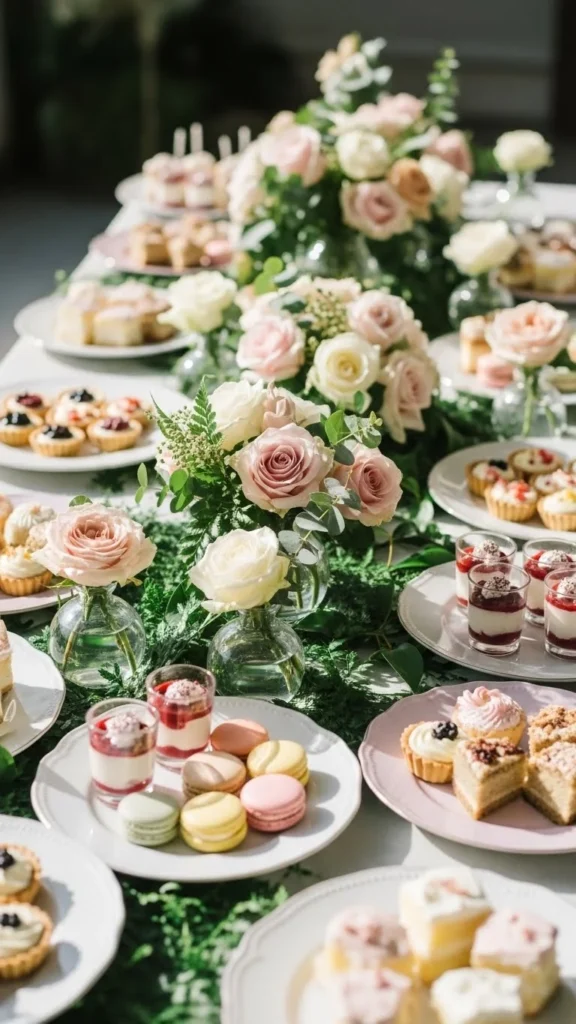
Flowers add softness and charm. Use small bunches instead of large bouquets so they don’t block desserts. Baby’s breath, roses, eucalyptus, and carnations are affordable and long-lasting options. Arrange single stems in tiny jars or repurpose spice bottles as mini vases. Keep flowers low and clustered for a cohesive look. Choose blooms that match your color palette so the table feels intentional. If you’re on a budget, mix fresh greenery with faux flowers—no one notices when done neatly. Florals also make your dessert photos pop, especially with neutral table linens.
3. Glass Jars Filled With Color-Coordinated Sweets
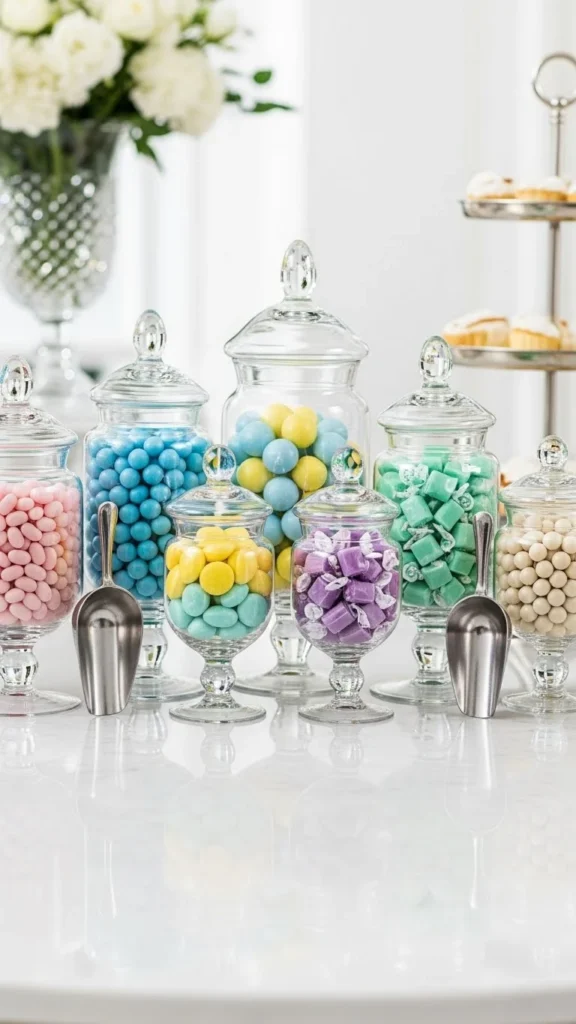
Clear jars are simple yet eye-catching. Fill them with candies, meringues, or cookies in colors that match your theme. Use various jar shapes to keep the table interesting. Raised lids and scoops make the display interactive. If you’re working with a tight budget, reuse jars from your pantry—just remove labels and polish the glass. Color coordination is key. Choose one or two shades so the table doesn’t feel busy. Place taller jars at the back and shorter pieces in front. This setup is easy to refill during the party and looks tidy even after guests start serving themselves.
4. Fabric Runners That Add Soft Texture
A fabric runner brings warmth and movement to your setup. Choose gauze, linen, or chiffon for a relaxed draped look. Let the fabric fall slightly over the edges for a soft, flowing effect. Neutral colors like cream, blush, or sandy beige work with almost any event. For DIY savings, cut fabric from inexpensive yardage rather than buying pre-made runners. Add small folds or bunches for dimension. Pair the runner with simple plates and trays so the table doesn’t feel crowded. This trick adds depth instantly without needing extra décor pieces.
5. Candle Clusters for a Warm Glow
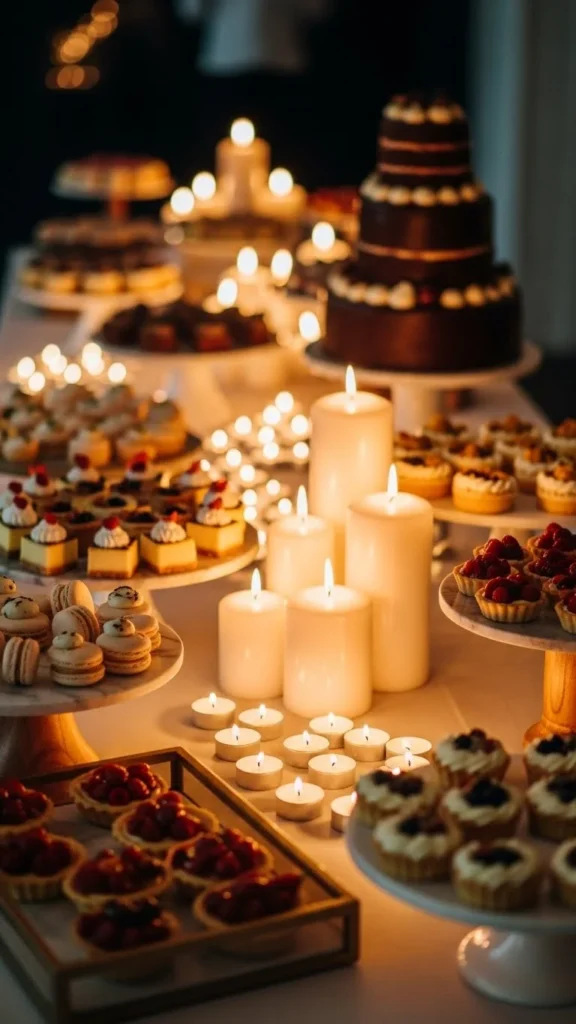
Candlelight makes any dessert table feel stylish and welcoming. Group candles in sets of three for a balanced look. Use different heights to add dimension. Stick with unscented varieties so the aroma doesn’t compete with food. If flames aren’t allowed, pick battery-operated candles—they photograph beautifully. Repurpose jars or small glass cups as candle holders. Place them away from delicate decorations to avoid heat damage. The gentle glow softens the entire table and highlights the desserts without overpowering them. This is one of the easiest ways to create a chic setting on a small budget.
6. Mini Chalkboard Signs for Dessert Labels
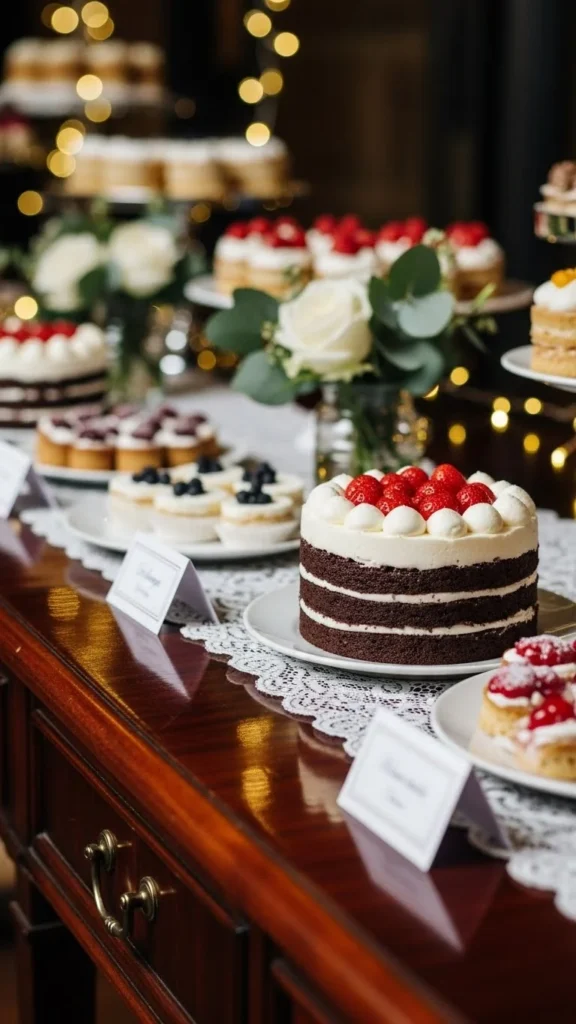
Labels help guests know what they’re picking, and they also add personality. Use small chalkboard signs, paper tags, or card stock folded into tents. Handwrite the names for a warm, personal touch. If you’re not confident in your handwriting, use simple block letters. Keep labels small so they don’t distract from the desserts. You can make your own by painting scraps of wood or cardboard with chalk paint. Attach them to toothpicks or skewers to create cake-top labels. Labeling makes your table feel organized and thoughtful.
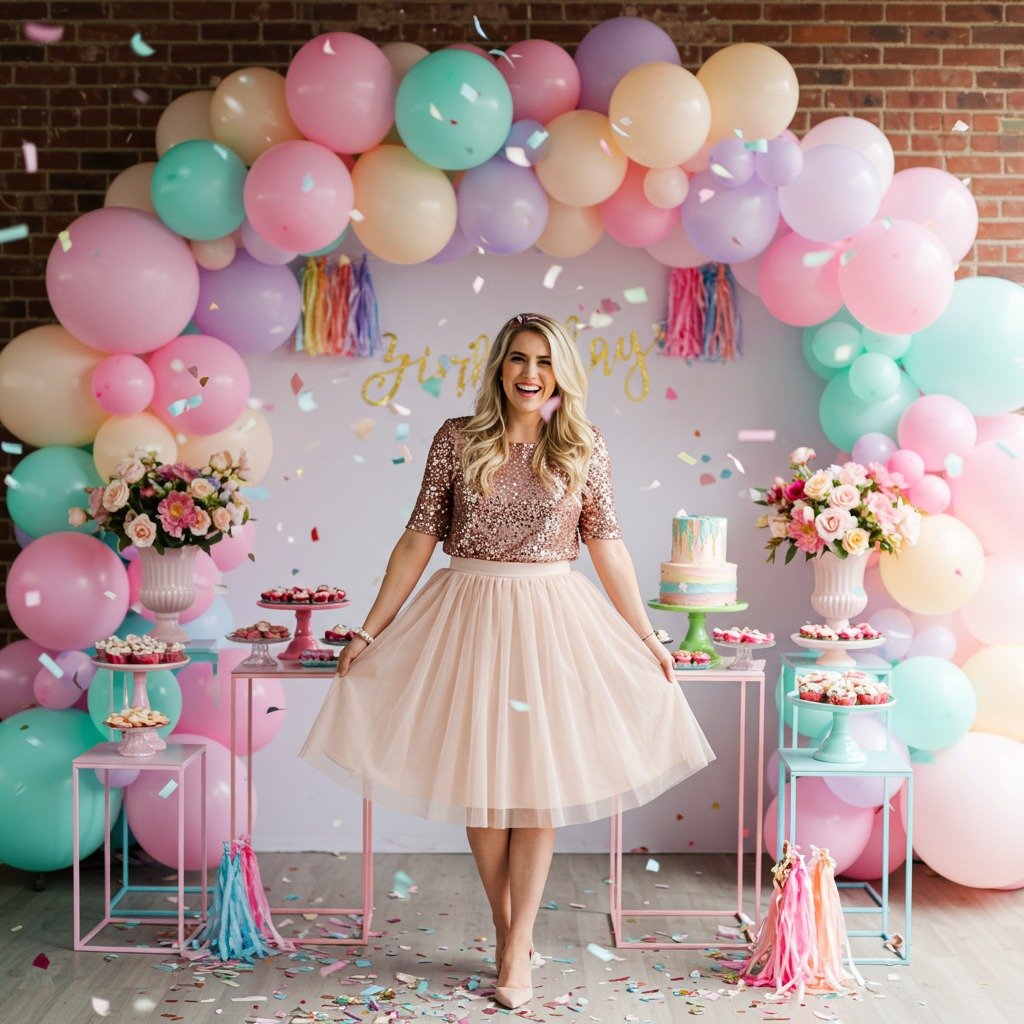
7. Draped Backdrops for a Complete Look
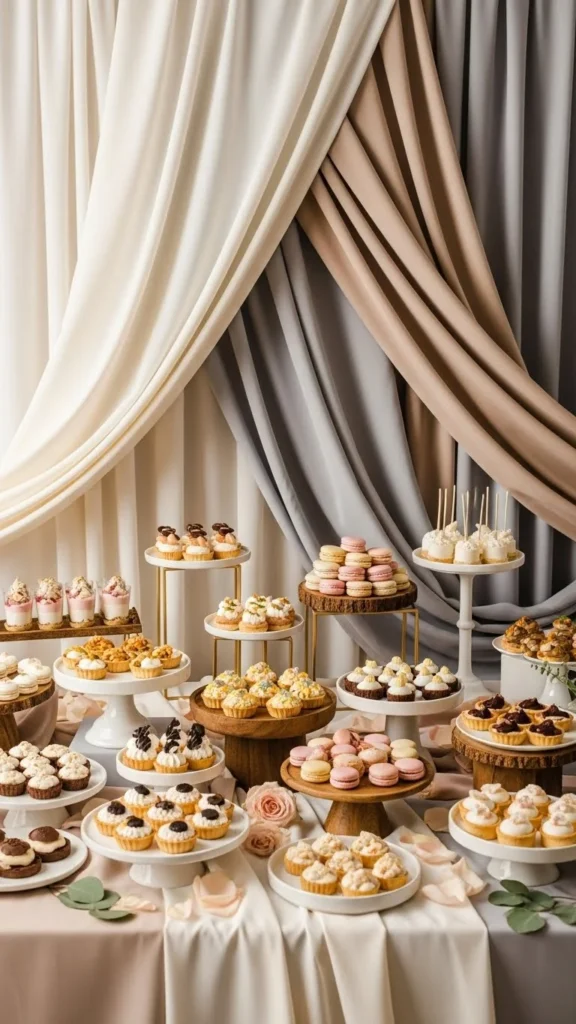
A backdrop frames your dessert table and instantly upgrades the entire space. Hang lightweight fabric, a curtain panel, or even a flat bedsheet for a clean look. Neutral tones allow the desserts to stand out. Add fairy lights or greenery across the top for extra charm. This works well in small rooms or plain walls that need dressing up. Use thumbtacks, command hooks, or a simple backdrop stand to hold everything in place. Backdrops make photos look polished and help your table feel cohesive from every angle.
8. Metallic Accents for a Touch of Shine

A little shine goes a long way. Metallic trays, spoons, and candle holders bring subtle glamour. You don’t need everything to match—mix gold and silver for a balanced look. Spray paint thrifted items to keep costs low. Use metals as accent pieces rather than the main theme. Place them near candles or fairy lights to let the reflections glow softly. Metallics pair well with white linens and neutral desserts like cookies, cupcakes, or pastries. Keep the display simple so the shiny details stand out naturally.
9. Fairy Lights for Subtle Sparkle
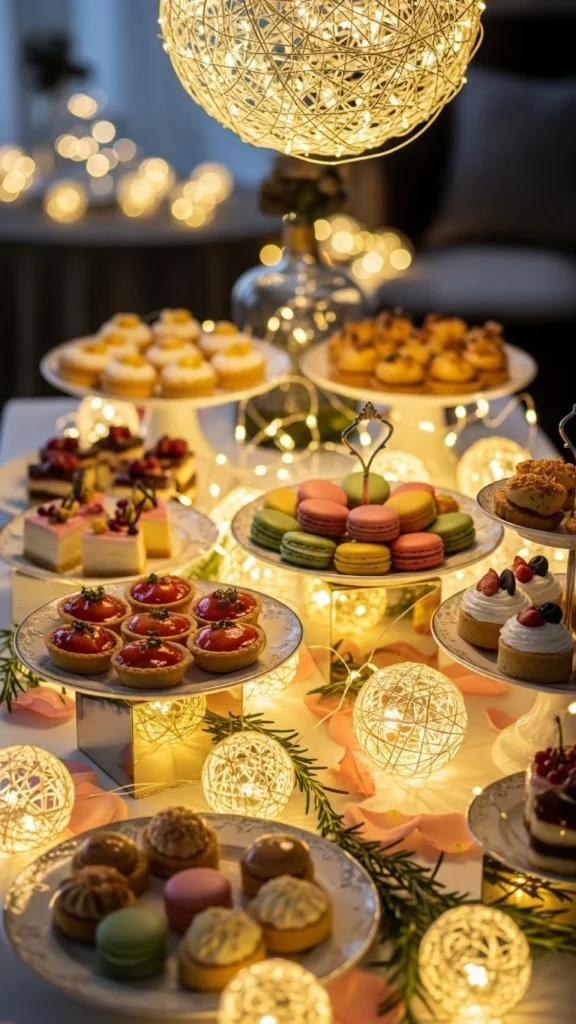
Fairy lights bring charm and a soft twinkle to your display. Weave them through greenery, tuck them behind jars, or place them across the table’s edge. Battery-powered strands keep the setup neat and flexible. Choose warm lighting for a cozy feel. Avoid heavy layering so the wires stay hidden. You can also place lights inside clear jars to create glowing centerpieces. This idea is budget-friendly and works for any event—daytime or evening. A few strands can completely transform the atmosphere and make desserts stand out in photos.
10. Matching Serving Plates for a Clean Aesthetic
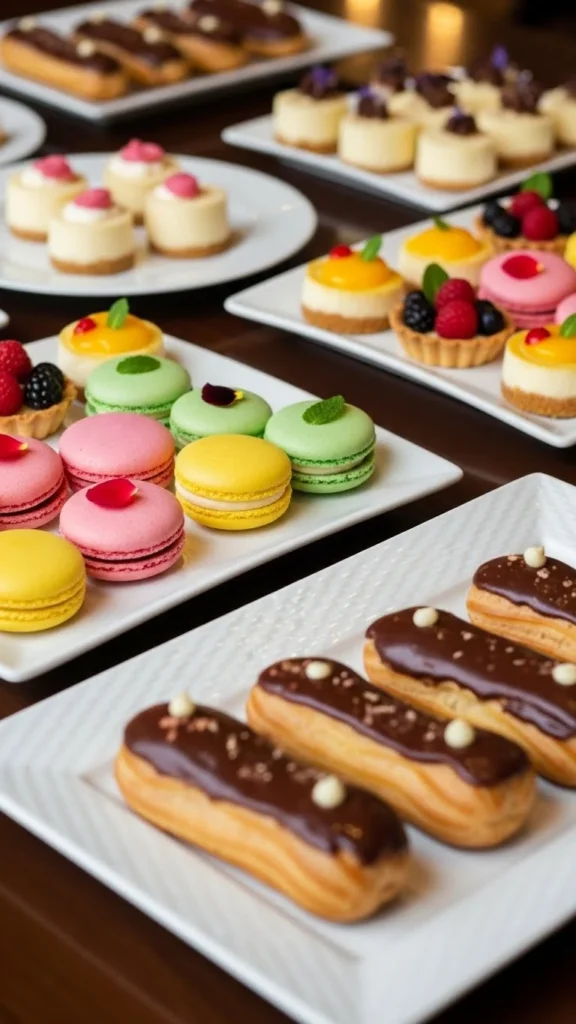
Matching plates give your table a refined appearance. Stick with one color—white works best for showcasing desserts. If you prefer color, choose muted tones that don’t overpower the treats. You can mix shapes like round, square, and rectangular for variation. Buying an affordable multi-piece set or using disposable high-quality trays works too. Consistency across serving ware makes even simple desserts feel upscale. Keep the layout linear or staggered depending on your table size. This small choice makes a noticeable difference in overall presentation.
11. Wooden Crates and Boxes for Rustic Charm
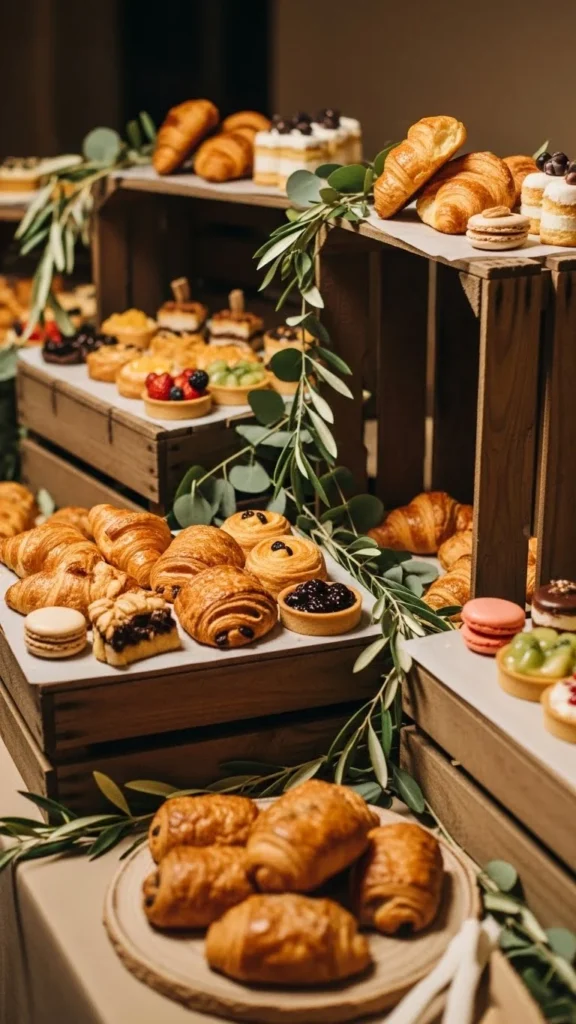
Wooden crates add depth and warmth. Use them as risers, fillers, or platforms for larger desserts. Flip them over for instant height. If the wood feels too rough, drape a piece of fabric or parchment paper over the top. You can stain or paint crates to match your theme. Mix different box sizes for a relaxed, rustic layout. This trick works especially well for outdoor events. Crates also help anchor the table visually without needing expensive décor pieces.
12. Coordinated Color Themes
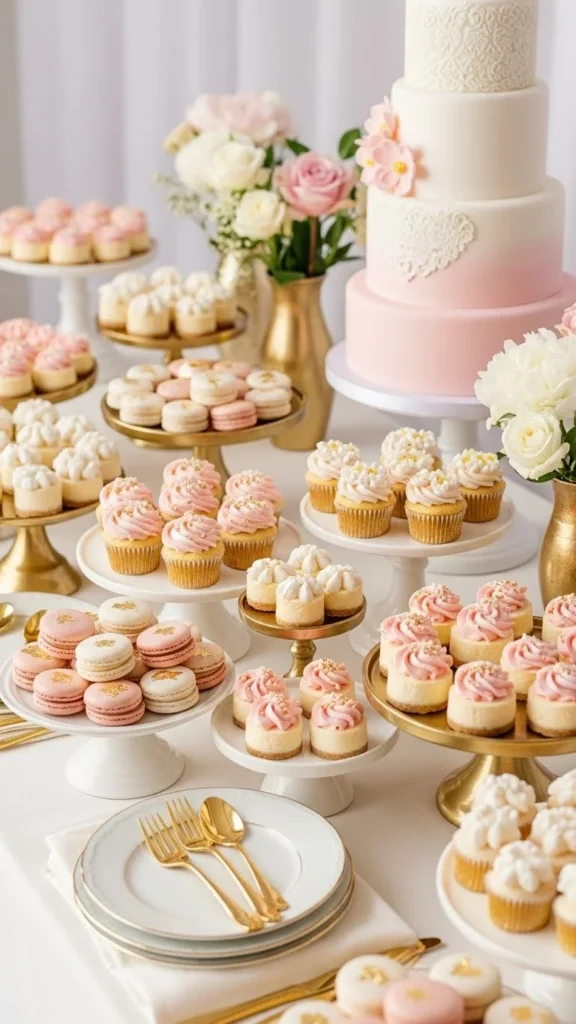
A single color palette keeps your table visually soothing. Choose two main colors and a neutral base. You can match desserts, linens, and props with those shades. Pastels, earthy tones, or monochrome setups work great. Don’t feel pressured to match everything perfectly. Small variations make the table feel natural. Use inexpensive ribbons or napkins to bring in additional color. When everything feels coordinated, guests instantly notice how put-together the table looks.
13. Mirrored Trays That Reflect Light
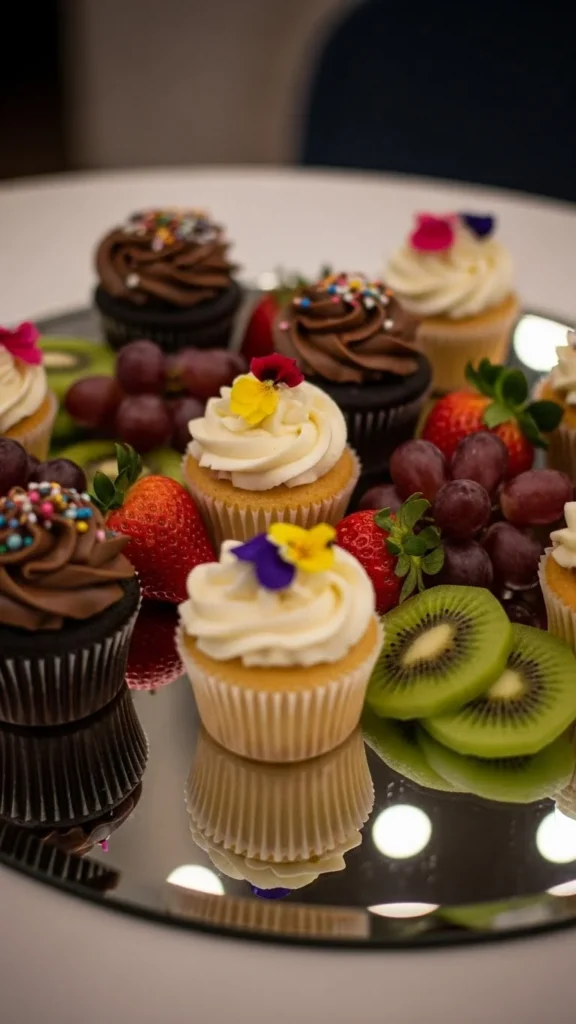
Mirrored trays create beautiful reflections that make desserts appear more abundant. They also brighten darker setups by bouncing light around. You can find affordable mirrored trays in home stores or online. If you’re on a budget, place mirrored tiles on the table and add a decorative edge with ribbon. Keep desserts simple so the reflections stand out. Pair mirrored trays with candles or fairy lights for extra radiance. This elegant detail instantly catches attention.
14. Decorative Garlands Around the Table
Garlands frame the table perfectly. Use greenery, faux leaves, paper garlands, or felt designs depending on your theme. Drape them lightly around edges or along the front of the table. Adding a few flowers or small ribbons enhances the look. DIY options are easy—twist faux greenery with twine or attach paper cutouts to string. Keep garlands light so they don’t cover desserts. This simple detail softens harsh lines and adds a finishing touch.
15. Decorative Frames Showcasing Menu Prints
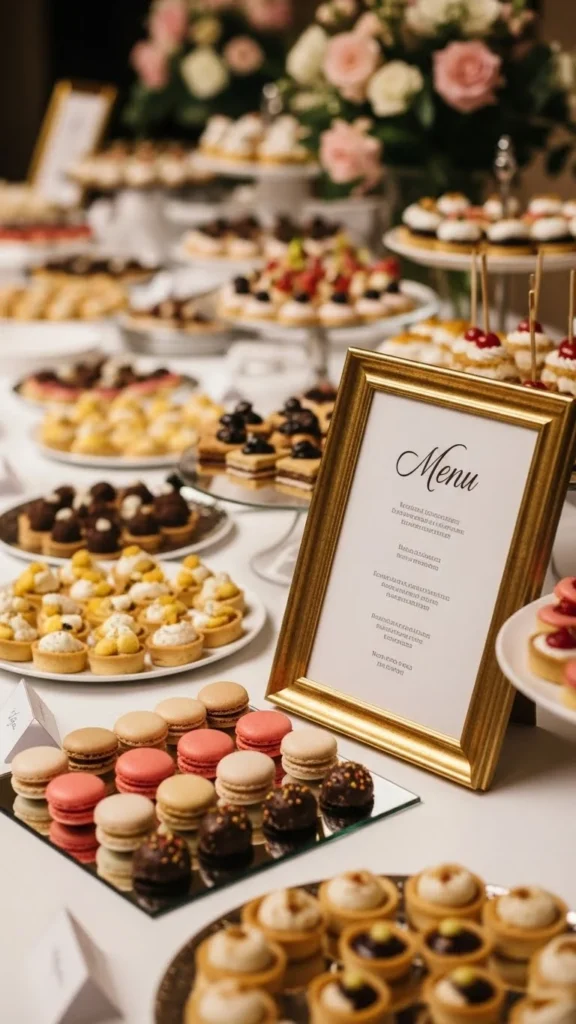
A framed menu adds personality and tells guests what to expect. Use a simple wooden or metallic frame. Print your menu on thick cardstock for a polished look. Keep wording short so it’s easy to read from a distance. Place the frame toward the back of the table so it doesn’t block desserts. Swap the menu for themed quotes or graphic patterns if you prefer. Frames also help tie your color scheme together when matched with other décor pieces.
16. Themed Props for Extra Personality
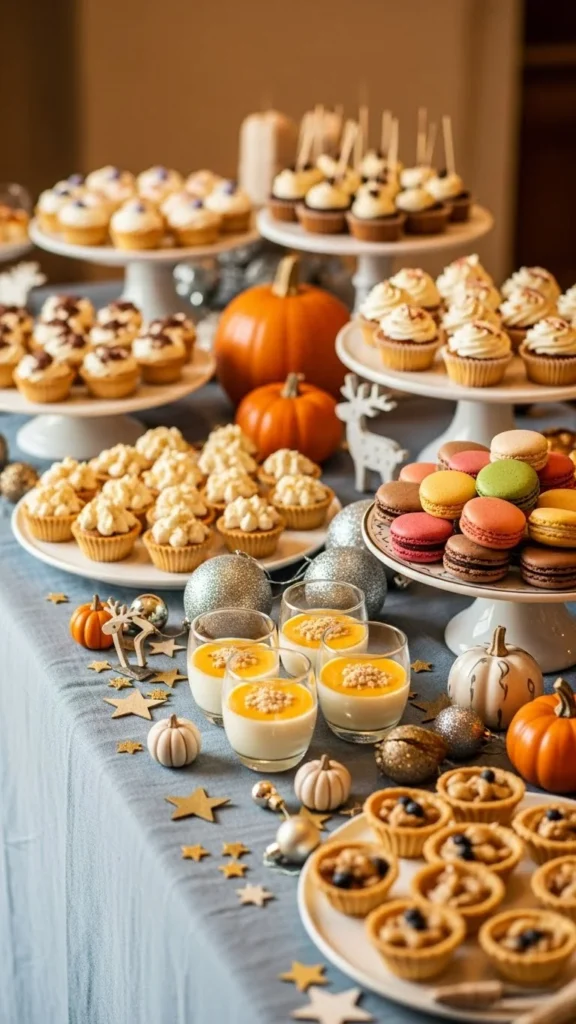
Props help tell a story. Use mini pumpkins for fall, seashells for summer, stars for birthdays, or ornaments for winter events. Keep props small so the desserts remain the focus. Scatter them in clusters or group them by theme. Look around your home—you likely already have pieces that fit. If buying new items, choose reusable décor that works for future events. Avoid overcrowding the table; a few well-placed props go a long way.
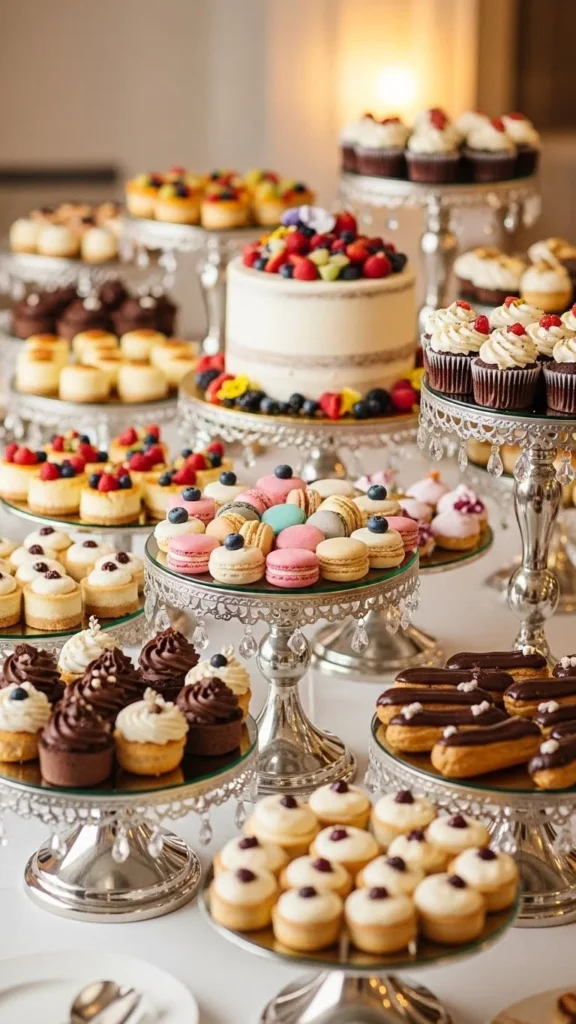
17. Tiered Cupcake Towers
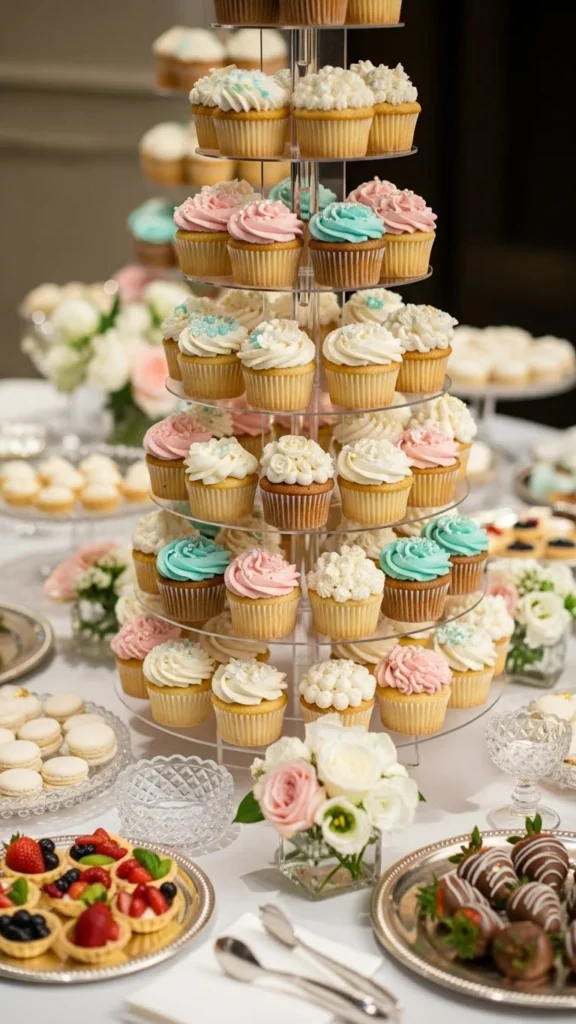
Cupcake towers draw attention instantly. They give your table height and act as a central anchor. Choose a sturdy stand that fits your color theme. You can DIY one using stacked plates and cups secured with museum putty. Arrange cupcakes with consistent spacing so the tower looks tidy. Add a few decorative toppers for flair. This tower works for birthdays, showers, and weddings. It’s functional and attractive without needing extensive setup.
18. Patterned Paper Plates and Napkins

Paper goods are an easy way to tie your theme together. Choose subtle patterns like stripes, dots, or florals. Avoid loud prints that compete with desserts. Matching plates and napkins keep the table cohesive. Buy in bulk to save money. Place napkins in small trays or baskets for neat access. Paper goods also add color if your desserts are mostly neutral. They’re affordable, practical, and stylish all at once.
19. Clear Acrylic Risers
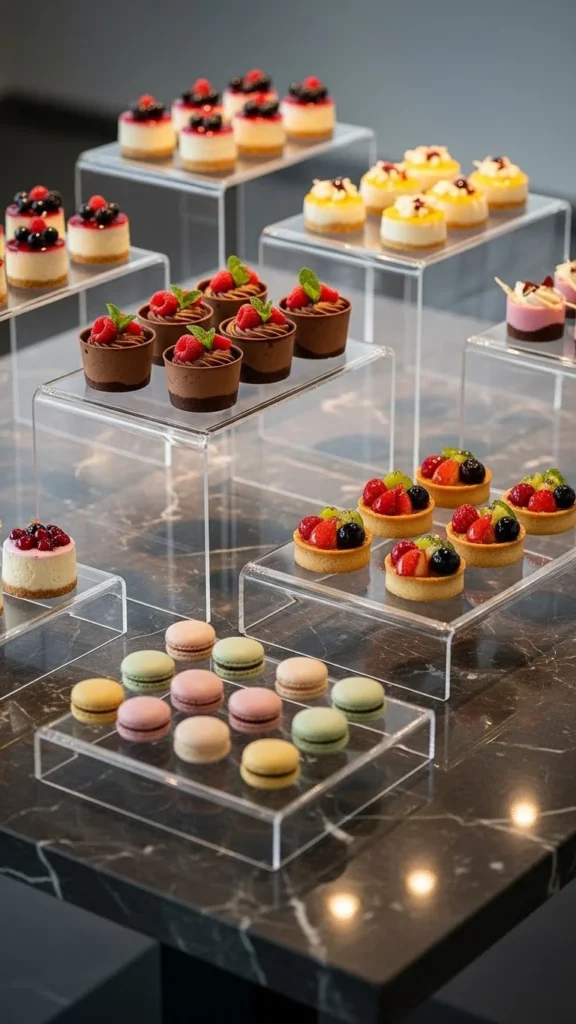
Acrylic risers create clean, modern height without drawing attention away from the desserts. Their transparency makes the table feel spacious. Use square or rectangular shapes for a structured look. If you don’t own risers, stack clear containers or glassware upside down as a low-cost alternative. Place cupcakes or small pastries on top for an instant lift. Acrylic displays also work beautifully with mirrored trays and fairy lights.
20. Edible Flower Garnishes
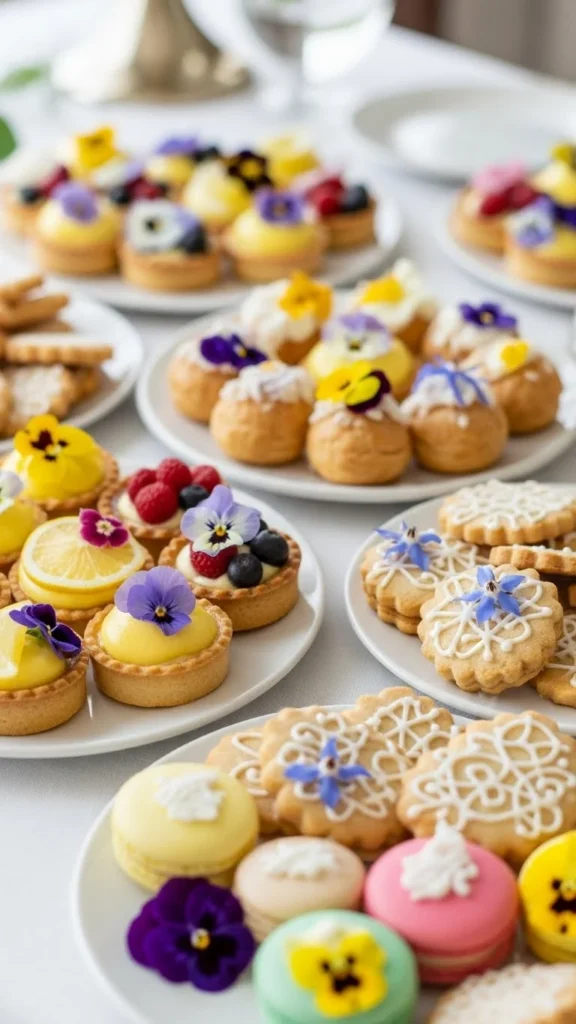
Edible flowers make your desserts feel special. Place them on cupcakes, cookies, or cakes right before guests arrive. Choose safe, food-grade flowers like pansies, violets, or marigolds. Use them sparingly so the treats remain the highlight. Store flowers in the fridge to keep them crisp. If edible flowers are hard to find, use small sprigs of fresh herbs like mint. They add color without overwhelming the table. This trick is simple, subtle, and beautiful.
21. Decorative Bowls for Fruit and Small Bites
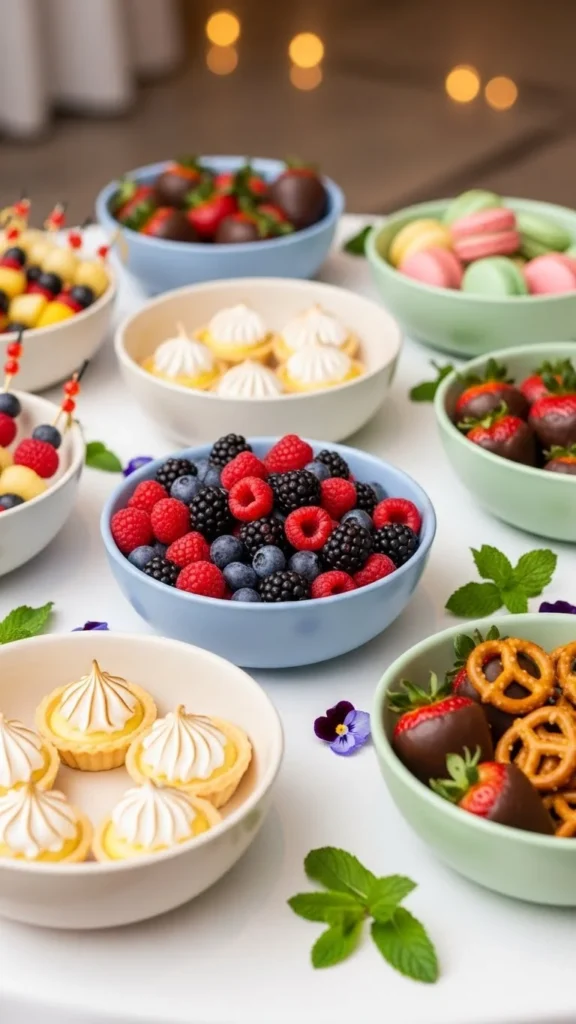
Bowls help break up the layout and add shape variety. Use ceramic, glass, or wooden options depending on your theme. Fill them with berries, macarons, pretzels, or small pastries. Keep colors consistent so everything looks coordinated. If bowls feel too plain, line them with parchment paper or colored tissue. Arrange them in odd-numbered groups for balance. Bowls also make restocking easy during the event.
22. Statement Centerpiece Dessert
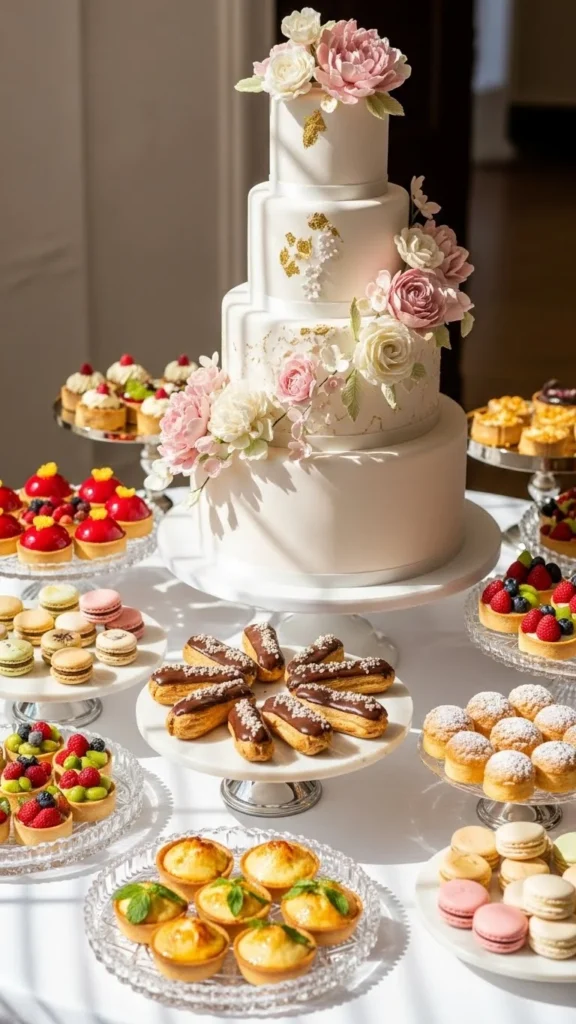
Choose one standout dessert that acts as the hero of the table. It could be a cake, tart, or decorated cookie board. Place it in the center or slightly off-center for visual flow. Use a cake stand or riser for height. Decorate lightly around it with fruit slices, herbs, or small candies. This anchors the table and helps guide where other treats should be placed. It also sets the tone for the entire display.
23. Seasonal Textures Like Wood, Glass, or Linen
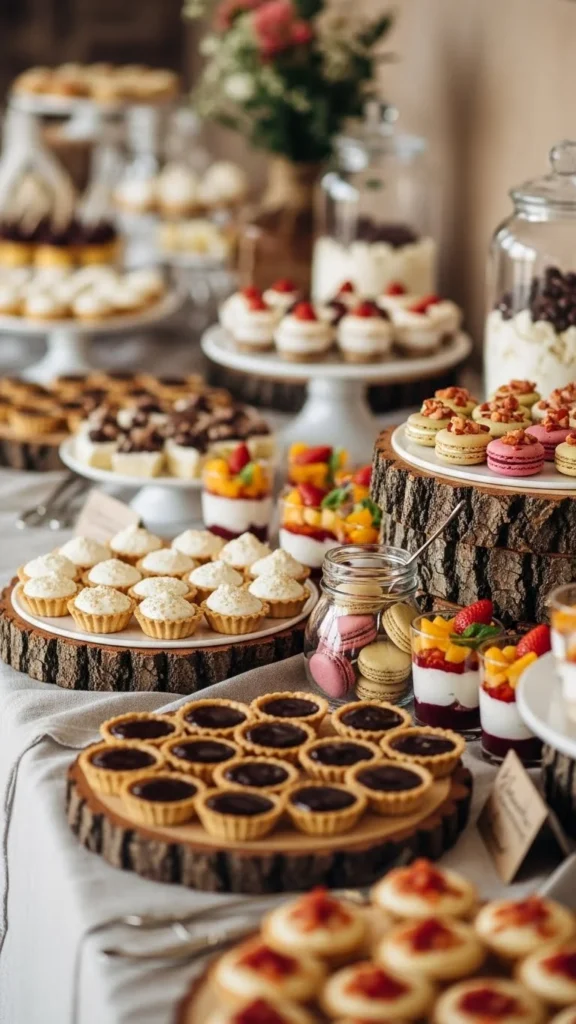
Textures add depth without needing many extra pieces. Use wood slices for rustic events, glass for modern themes, and linen for soft and cozy setups. Combine two textures for balance. Avoid mixing too many so the table stays clean. Repurpose household items such as cutting boards or glass jars. Textures make everything feel thoughtful while keeping costs low.
24. Single-Color Dessert Arrangements
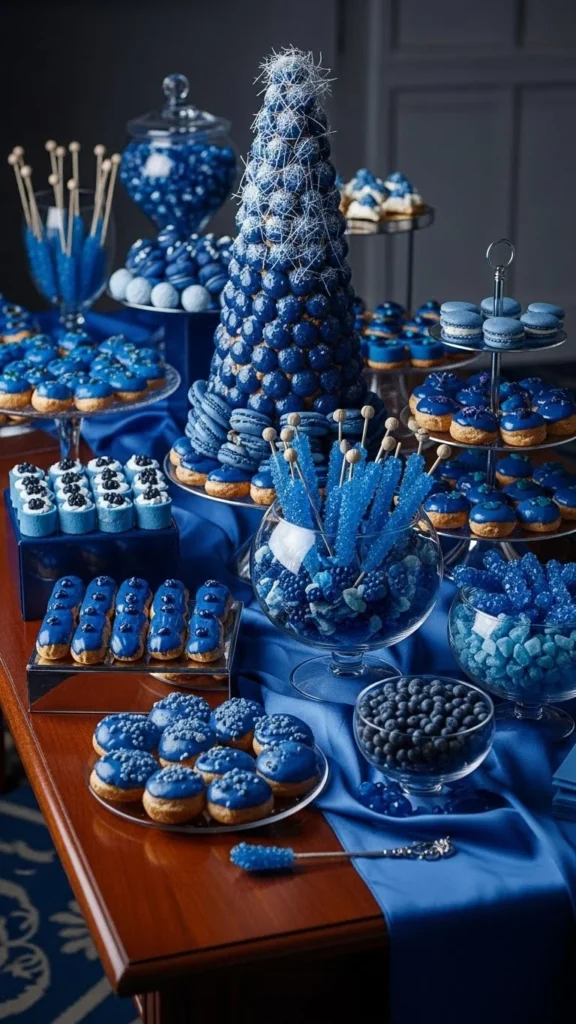
Using one color for all desserts creates a bold, chic look. Choose a color that matches your theme—pink, white, chocolate brown, or pastel blue. Mix textures and shapes so the table still has variety. Add neutral serving trays to let the color stand out. This approach is simple but striking, especially in photos. It also makes it easy to shop since everything follows a clear direction.
Conclusion
A beautifully designed dessert table doesn’t require expensive décor or professional help. Small choices—like height, lighting, color coordination, and thoughtful accents—make a huge difference. Use the ideas above to create a display your guests will admire and photograph. With the right mix of simple props and creative touches, your dessert table truly can steal the show at any event.
Leave a Reply