
Easter is the perfect time to unleash your creativity—and nothing says spring quite like beautifully decorated eggs. Whether you’re planning an Easter brunch, a family craft day, or just want to add a pop of pastel charm to your home, decorating eggs can be a fun and rewarding DIY project. The best part? You don’t need to be an artist to make them look stunning.
Gather Your Egg-Decorating Essentials
Before you start, make sure you have all your supplies ready. A little prep makes the process smoother and more enjoyable.
Here’s what you’ll need:
- Eggs (hard-boiled or blown-out)
- Food coloring or natural dyes
- White vinegar
- Cups or bowls for dye
- Spoons or tongs
- Paper towels
- Optional extras: washi tape, gold leaf, stickers, glitter, markers, or lace
If you’re using hard-boiled eggs, let them cool completely before dyeing. For keepsake decorations, blow out the eggs instead to make them last longer.
Step 1: Choose Your Color Palette
The magic of Pinterest-perfect eggs lies in cohesive color choices. Instead of random shades, think in themes.
Here are a few ideas:
- Pastel Dream: Soft pinks, lilacs, mint greens, and butter yellows.
- Modern Minimalist: White eggs with black geometric doodles or metallic accents.
- Boho Vibes: Earthy tones with speckled finishes and twine.
- Glam Touch: White or neutral eggs with gold leaf or metallic foil.
Mix one teaspoon of vinegar with each dye color to help it stick evenly. Experiment with dipping times for lighter or deeper shades.
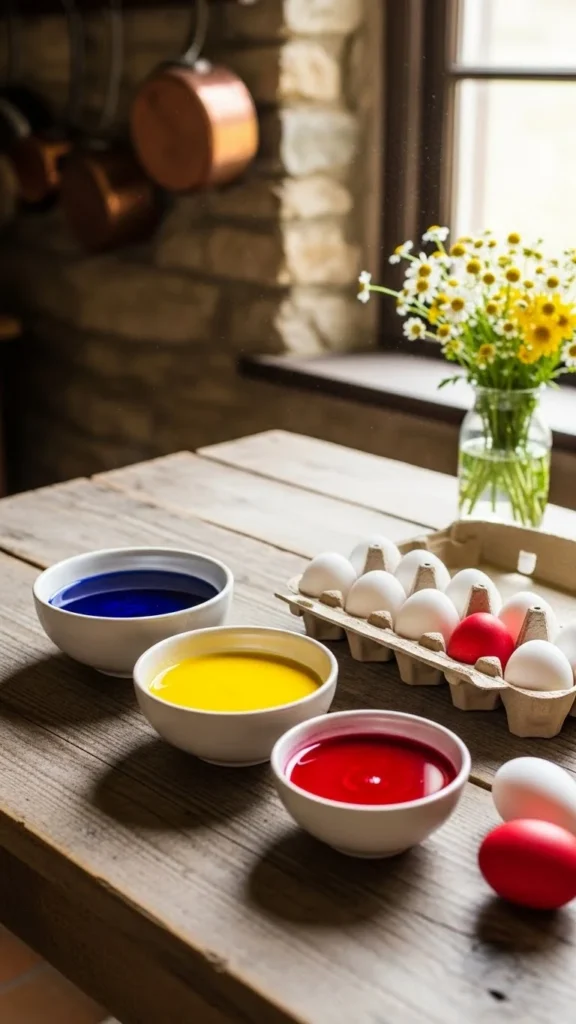
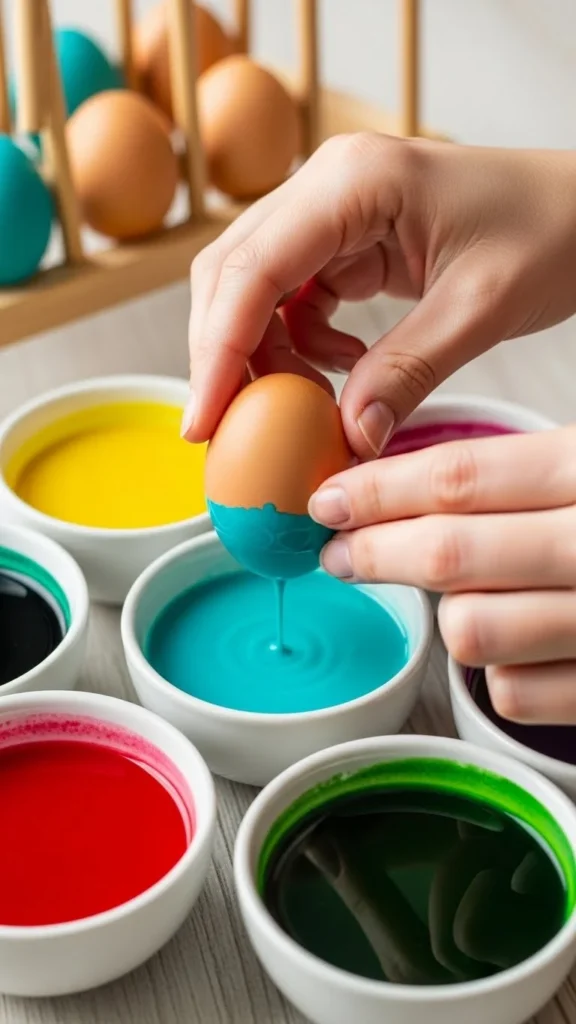
Step 2: Master the Dyeing Technique
Classic dyeing is simple, but there are so many ways to take it up a notch. Try these creative twists:
- Ombre Dip: Slowly lower the egg into the dye so the bottom becomes darker than the top.
- Rubber Band Patterns: Wrap elastic bands around the egg before dyeing for fun stripe effects.
- Marbled Magic: Add a few drops of oil to your dye bath. The oil resists color in spots, creating a dreamy marbled look.
- Natural Dye: Use kitchen ingredients like red cabbage (blue), turmeric (yellow), or onion skins (orange) for earthy hues.
Set the eggs on a drying rack or paper towel, turning occasionally to avoid pooling dye.
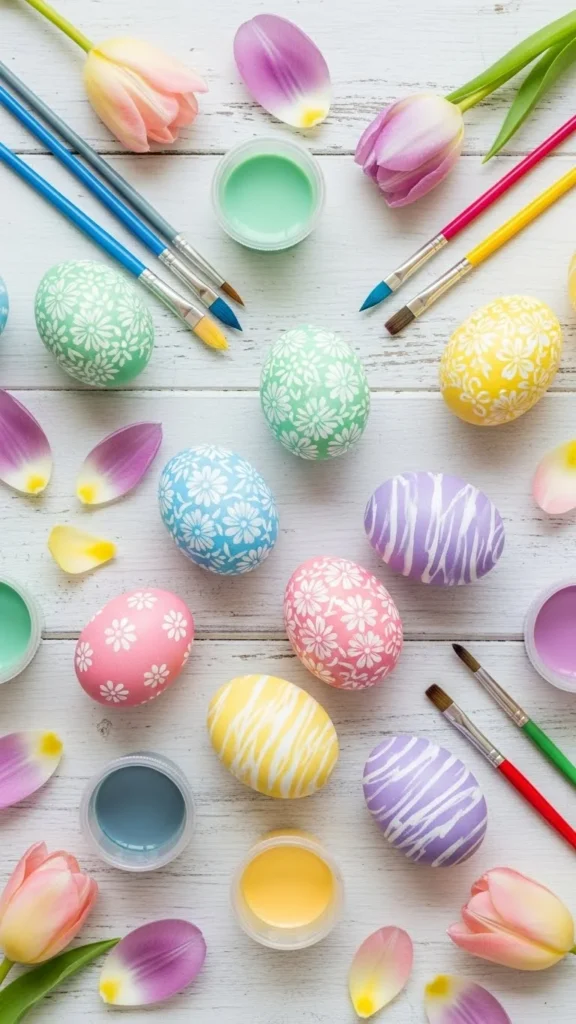
Step 3: Add Details That Pop
Now comes the fun part—personalizing your eggs with decorative touches that make them stand out.
- Gold Leaf Luxe: Apply a bit of adhesive and press gold leaf gently onto dry eggs for a luxe finish.
- Paint Splatter: Use a toothbrush dipped in paint to flick tiny specks for a playful, artsy vibe.
- Decoupage: Use floral napkin cutouts or tissue paper to wrap around the egg, sealing with mod podge.
- Stickers or Washi Tape: Perfect for adding patterns or cute shapes without any mess.
These small details turn simple eggs into photo-ready masterpieces.

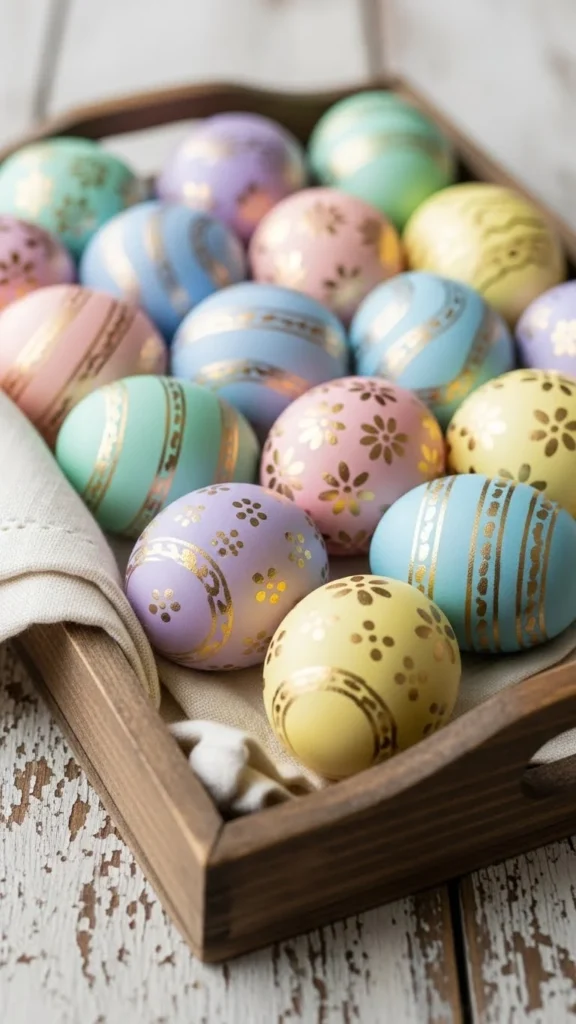
Step 4: Display Your Creations Beautifully
Once your eggs are dry and decorated, it’s time to show them off. Presentation makes all the difference!
Try these Pinterest-worthy display ideas:
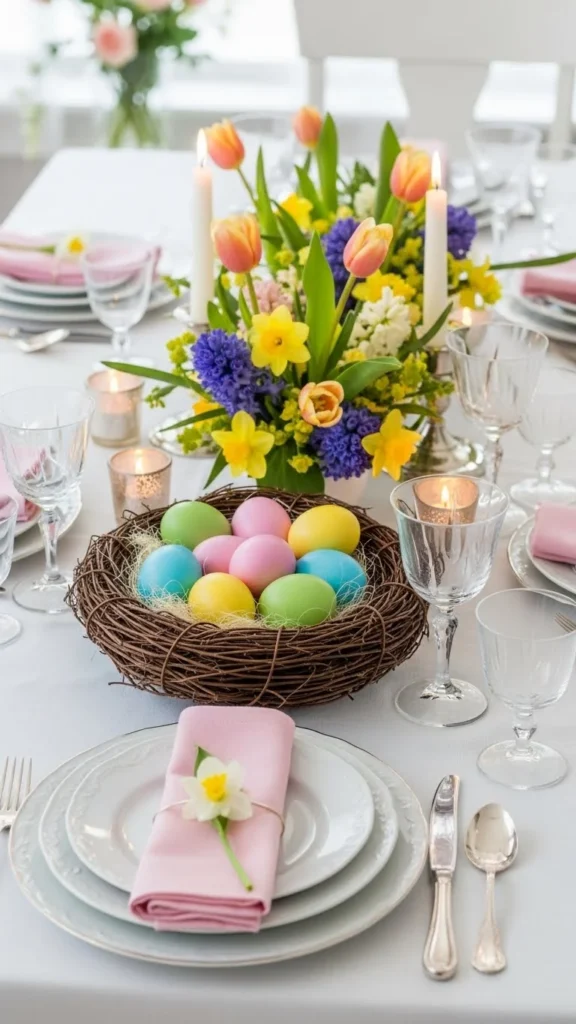
- Nest Centerpiece: Arrange eggs in a decorative bowl with faux moss, twigs, and flowers.
- Egg Carton Chic: Use a painted carton as a rustic display for different designs.
- Glass Cloche Display: Place your prettiest eggs under a glass dome for an elegant look.
- Table Setting Accent: Add one egg to each plate with a name tag or small flower for a personal touch.
Step 5: Preserve Your Favorite Eggs
If you’ve created designs you can’t bear to part with, preserve them! Blown-out eggs can be sealed with a clear acrylic spray or mod podge for durability. Store them carefully in tissue paper or egg cartons to reuse next year.
This way, you can build a growing collection of handmade Easter décor—each year more beautiful than the last.
Final Thoughts: Make Easter Unforgettable
Decorating Easter eggs is more than just a craft—it’s a joyful tradition filled with color, creativity, and a touch of nostalgia. Whether you go minimalist or bold, each egg reflects your personality and the joy of the season.
So grab your brushes, mix your dyes, and start crafting eggs that could easily trend on Pinterest.
Save this idea for later—and make next Easter your most beautiful yet!
Leave a Reply